With the growth of the internet, more and more business websites, art websites, photography websites, and many more are becoming famous. Most of them use HOSTINGER for hosting their websites. Hostinger has over 29 million users today. But many of you might find difficulty in installing WordPress in Hostinger. So, today we’re gonna discuss how you can install WordPress in Hostinger.
Why WordPress?
Before discussing the installation process Of WordPress Hostinger, we need to understand why we’re discussing the installation of WordPress. Well, there are a bunch of reasons we can put forward like there are 400 million users of WordPress. WordPress is a free and open-source application that you can modify and improve according to your preference.
You can create various types of websites such as blogging, knowledge, business, eCommerce, art, photography, and many more. The amount of tutorials available for WordPress makes it the easiest to use. Also, WordPress is free and also supports various platforms like PHP, MySQL, etc. With the release of the latest version, CHP is also getting updated, improving security and many other features.
Which Is Better WORDPRESS.ORG or WORDPRESS.COM?
Both WordPress.Org and WordPress.Com are ways to host your WordPress website. On wordpress.org, scripts can be downloaded free of charge and you can host them yourself.
While WordPress.com takes care of everything by hosting the site for you. If you don’t want to have your own hosting web server, then wordpress.com is the option for you. But then your website will include wordpress.com in the URL and you won’t be able to install plugins and custom themes.
Using wordpress.org provides more control over your site. In this, you’ll be able to use your own domain, install plugins, and upload themes. You’ll also have access to the database and code which means you’ll be able to modify it according to your preference.
Process of Installing WordPress in Hostinger
Many people start websites from their homes with low-end PCs. WordPress makes it easy for them as it is low-end software. It just requires PHP 5.2.4 or higher and MySQL 5.0.15 or higher.
So, for our readers, we are going to explain various ways to install WordPress in Hostinger. The two most popular ways to do it are by Auto-Installation and Manual Installation.
Auto-Installation WordPress Installation in Hostinger
If you’re a beginner at all these and don’t know the technical terms and ways to use them, Hostinger makes it easy for you. Its auto-installation process makes it quite easy for you. Just follow the following process.
- Launch Hostinger and open the control panel.
- You’ll find an option for Auto Installer. Click on it.
- Find WordPress in the drop-down menu and open it.
- A new form will open in front of you.
If you’re newer in the digital world and you have started a new business or you want to run your website then, these things will help you in which this is one of them for instance best hosting option for WordPress in 2024.
You’ll need to fill in the details in the form. A general idea of the form is given below:
- URL – In this section, you need to enter your URL where WordPress is needed to be installed.
- Language – Here, select your language for WordPress.
- Username – Now, just like you need a username for logging into any other software like Adobe Photoshop, Facebook, etc, here also you need to create a username for logging in the future. So, create a unique username that you can easily remember.
- Password – For This section, you need to create a strong password, which no one can guess. You need this for the protection of your website. You will need this at the time of logging in along with the USERNAME.
- Email – Enter your email in this area. The company will contact you on this email for any further updates.
- Title – Now, you must have a title for your website in your mind. Fill it in this section.
- Tagline – Enter a website tagline describing briefly your website.
At last, press the Install button and you are good to go.
See, it was easy like we told you. Easy and simple.
Now, let’s move to the section for those who know a little bit about technical terms and have some experience with the software.
Manual Installation Of Hostinger WordPress
This process is for those who understand WordPress and have installed other software in the past. It’s an easy task. For this process, you will need just 2 software, a file manager, and the latest version of WordPress.
First, you need to download the latest WordPress Software from its official website.

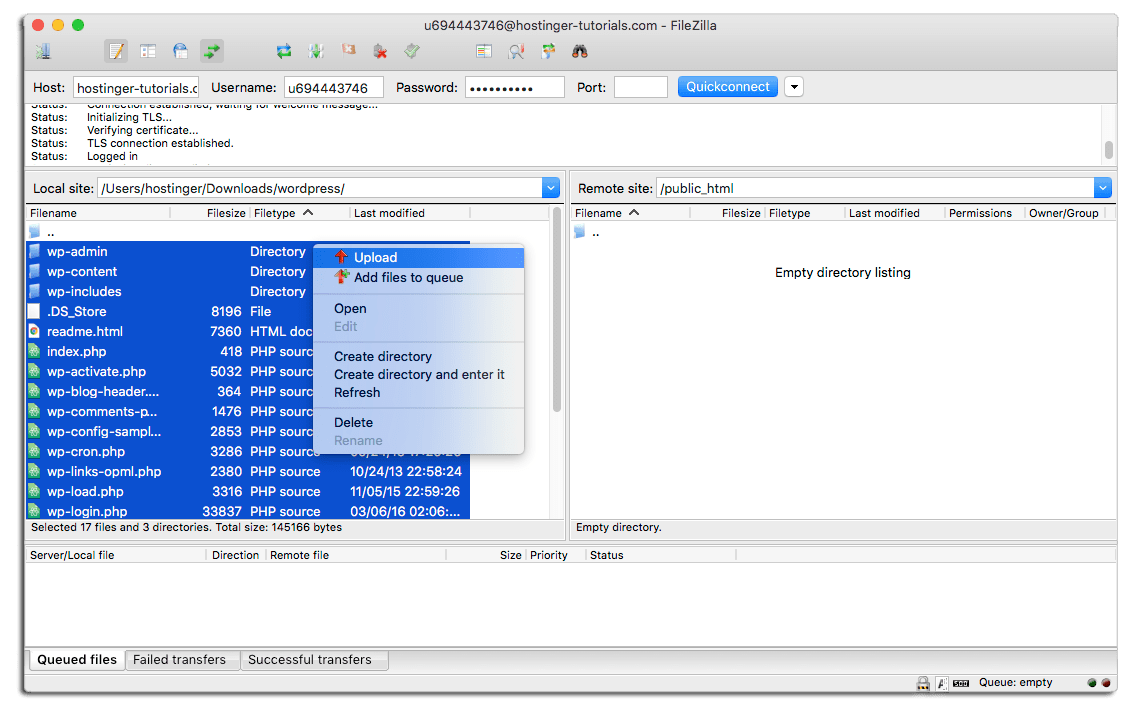
After that, upload WordPress files to your hosting account. Either use a file manager provided by your hosting provider or an FTP client. Either way, just keep an eye on the file destination.
For example, upload the files to the public_html folder if you want WordPress on the root domain. And if you want it from the subfolder or subdomain, upload the files to the appropriate folder.
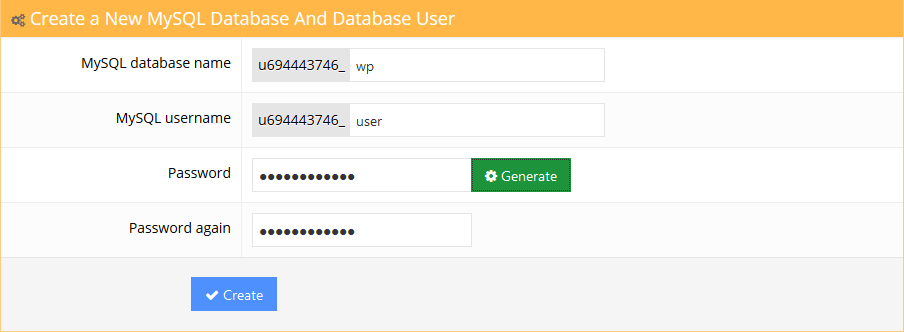
Now, it’s important to create a database because WordPress stores all the information in databases. You can create a new database on Hostinger in the MySQL Database section. Just remember the credentials for later.
Now for the final installation process, visit your domain name. Here you’ll be asked for administrative details, MySQL database details, and site information. Along with it, check out the does Hostinger offers free domain registration in 2024?
Wrap Up – Process to Install WordPress In Hostinger
These were the two simple ways for Installing WordPress in Hostinger. We hope this information has helped you to clear all the doubts regarding the installation of WordPress in Hostinger.